Wednesday, November 11, 2026
Gothic Winter - Animated

This animated tutorial was written by me on November 11, 2026. The results are of my own imagination. Any resemblance to another tutorial is purely coincidental.
Please DO NOT claim this tutorial as your own.
This was written assuming you have a working knowledge of PS.
Please keep in mind that I write the tutorial as I am creating it.
Sometimes I may not explain properly where to place things so please see my example if you are ever in doubt :)
You will need to create the tag first. The tutorial to the non animated tag can be found here.
Supplies needed:
I am using Adobe Photoshop 2026 but this tutorial should work with any version.
You can download the 7 day trial of PS here.
PTU Animation: I am using Kiya Designs's animation from "Ghostie - Bats" animation pack which you can purchase here. Please read Kiya's TOUs.
Notes:
I learned how to use PS for tags by trying tutorials from Tutorials by Rene. You can find her PS tutorials here.
I use the CTRL + T command for resizing and rotating.
Click on image to enlarge it.
Resizing: Click on the link to lock the W: and H: for resizing.

Rotating:
This is for rotating to the right enter 15 degrees. To rotate to the left you would enter -15 degrees

To mirror or Flip go to Edit>Transform>Flip Horizontal (mirror) or Flip vertical (Flip).
Remember to save often.
Let's get Started:
We will need to do a little bit of editing to the tag before animating. This part is optional but I find the tube does not turn out so grainy when animating.
Open your tag psd file in PS if not open already.
Select your tube layer.
Right click on the tube and duplicate layer.
Standing on the duplicate layer, right click and clear layer style and delete smart filter.
Still on the duplicate layer, go to Filters>Blur>Gaussian blur. Set it to 5 and click ok.
Still on the duplicate layer.
Hold down your ctrl key and click on the thumbnail of the original tube. You will see marching ants around your tube. Click on the mask icon on the bottom of your layer pallet.
Change the blend mode to soft light and lower the opacity to 30.
Right click this layer and duplicate it.
Standing on the new duplicate layer, change the blend mode to Screen and lower the opacity to 20.
Open Kiya's psd file in PS. You will notice that there is 24 layers in this animation and it does not have the group layer. That is ok as we are going to learn how to do this.
We need to group all the layers. Starting from layer 24, hold down your Shift key and select layer 1. Once all the layers are selected (the layers will be highlighted) we need to group them. All layers selected?
Go to Layers, Group layers. You will see group 1 folder at the top. Make sure Group 1 is selected.
Select the layer in your tag that you would like the animation to be placed. I selected the Moon layer (element 91).
Back to the animation. Click on Group 1 and drag it into your tag. Hit Ctrl+T on your keyboard and resize 20%. Move to a spot you like best over the moon. I moved it to the top of the moon.
Close the original animation and don't save changes.
Click on the little white arrow beside Group 1 to expand it. Click on the eyeball of each layer to hide it but leave frame layer 1 visible.
Select element 91. Right click and copy layer style.
Select the group 1 folder. right click and paste layer style.
Click on the arrow beside group one to hide the layers as we do not want to accidentally make any changes.
Next make sure your Timeline viewer is open on the bottom of PS. If you do not see a row at the bottom of PS that has Create Frame Animation on the bottom, go to Windows>Timeline.

Now we are ready to animate.
Next is animating.
Click on Create Frame Animation (this might look different depending on the PS version you are using). The timeline screen should only have one frame in it.
Click on the little icon (three horizontal lines) at the top right end of the timeline screen. A pop up menu will appear. Select make frames from layers.

You are going to see a big mess in the animation window but we are going to fix this.

Click on the first frame and click on the trash can in the animation window (icon that looks like a trash can in the timeline viewer. Repeat this until you reach the first frame of the animation.
Now you should be at the first frame of the animation. Click on frame 25 and hit the trash can. Repeat for all the remaining frames.
Note: A faster way is to select the frame after the animation and hold down the shift key.
Select the last frame in the timeline and hit the delete icon.
You should be left with 24 frames in the animation window. This is the amount of frames for our animation.
This next step is very important. Any changes you do from here you must be on frame 1 in the animation window. It will be highlighted in blue.
Make sure you have animation frame 1 in the timeline selected.
Scroll down to the bottom of your tag in the layers pallet.
Starting from the bottom of the layer pallet, click on the eyeball beside each layer to make it visible. For the white base layer you may have to click on it a couple of times to make it visible in all the animation frames. It's a Photoshop thing. Do not touch the group layer.
This is what the animation window should look like once all the frames are visible.
Note: My screen isn't large enough to show all 24 frames.

Next, I want to slow down the animation. With the first frame selected, hold down the shift key and click on frame 24. This will select all the frames.
Next, click on the little black arrow beside the 0 sec as we want to change the speed. A pop up window will appear.

I selected 0.1 Second.
Now click on the play button in the timeline viewer to view the animation. Click on it again to stop it.
Click frame 1 again so we don't accidentally make any changes.
Now to save our tag as a gif.
Go to File>Export> Save for Web.
A new pop up window will appear. Change the settings to my screen shot below. Click on the image to enlarge it if needed. Click save. Save it to your computer in your tags folder.

I hope you have enjoyed my tutorial.
Gothic Winter - Non Animated

This tutorial was written by me on November 11, 2026. The results are of my own imagination. Any resemblance to another tutorial is purely coincidental.
Please DO NOT claim this tutorial as your own.
This was written assuming you have a working knowledge of PS.
Please keep in mind that I write the tutorial as I am creating it.
Sometimes I may not explain properly where to place things so please see my example if you are ever in doubt :)
Supplies needed:
I am using Adobe Photoshop 2026 but this tutorial should work with any version.
You can download the 7 day trial of PS here.
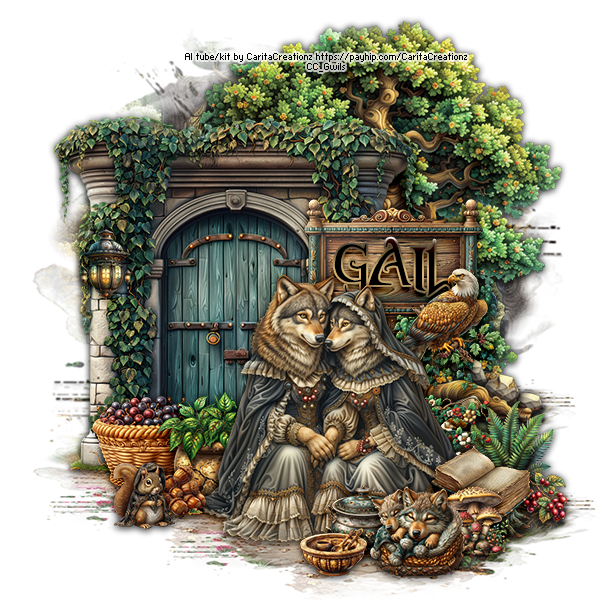
PTU Kit: I am using a gorgeous kit called "Gothic Winter" created by Starlite and Soul. This kit contains an AI tube that I used in this tutorial. You can purchase the kit here.
FTU Mask: Mask 41 by Vivienne. Thank you for your masks. You can grab it here.
Please read all the Artist's/Designer's TOU.
Font of choice for your name.
Plug in: None
Drop shadow of choice.
Notes:
I learned how to use PS for tags by trying tutorials from Tutorials by Rene. You can find her tutorials here.
I use the CTRL + T command for resizing and rotating.
Click on the images to make them larger.
Resizing: Click on the link to lock the W: and H: for resizing.
Rotating:
This is for rotating to the right enter 15 degrees. To rotate to the left you would enter -15 degrees
To mirror or Flip go to Edit>Transform>Flip Horizontal (mirror) or Flip vertical (Flip).
Don't worry about the drop shadow as I add it at the end of the tutorial.
Remember to save often.
The resizing in this tutorial should also work in PSP.
You might want to grab a coffee or something to drink as my tutorials are lengthy due to how many elements I use in the tag.
Let's get started.
First, we need to convert the jpg mask into a png.
You can find the tutorial here.
Now that our mask is ready we can continue. Note: I will be adding the mask at the end of this tutorial.
Open a new 850x850 transparent image.
Add a new Raster layer.
Go to layers, new fill layer, solid color. When the pop-up window appears type in FFFFFF and click ok.
Open Element 91 in PS. Select Layer 1 in the layer pallet and drag it into your tag. Right click on the element and convert to a smart object. Resize 52% and move to the top center of the tag.
I will be repeating the Open element/paper, select Layer 1 in the layer pallet and drag it into your tag. Right click on the element and convert to a smart object for the all the elements/papers before resizing. I will not be including this step in the remainder of the tutorial.
Element 1: Resize 63% and move to the right of element 91.
Element 30: Resize 50% and move to the left of element 1.
Paper 7: Resize 40%. Drag this layer under element 30 layer. Move the paper into a spot you like best in the opening of element 30. Select your lasso tool on the left of PS.
Holding down the left mouse button, draw a selection around the outside of the opening of element 30. Don't worry if it goes past the bottom of element 30 as we will be covering this with element. Once you have make you selection. Still standing on the paper layer, click the mask icon on the bottom of the layers pallet.

Select element 30.
Element 70: Resize 19% and move to the top left of element 30.
Element 74: Resize 52% and move to the lower left of element 70.
Element 86: Resize 57% and move to the bottom of element 74.
Element 69: Resize 13%, mirror and move to the lower left of element 86.
Element 36: Resize 47%, mirror and move to the lower right of element 86.
Element 83: Resize 28% and move to the lower left of element 36.
Element 40: Resize 11% and move to the bottom left of element 83.
Element 46: Resize 15% and move to the upper right of element 83.
Element 12: Resize 15%, mirror and move to the bottom of element 40.
Element 101: Resize 12% and move to the right of element 40.
Element 99: Resize 12% and move to the far right of element 101.
Element 87: Resize 16% and move to the upper middle of elements 101 and 99.
Element 57: Resize 12% and move to the lower left of element 101.
Element 9: Resize 13% and move to the lower right of element 99.
Element 98: Resize 13%, mirror and move to the lower left of element 9.
Element 41: Resize 17% and move to the left of element 98.
Element 34: Resize 42% and move to the lower left of the house. See my example for placement.
Element 77: Resize 16% and move to the lower right of element 34.
Element 86: Resize 55% and move to the bottom of element 34.
SS_GothicWinter_AiTubeSAS: Resize 25% and move to the bottom left of element 34.
Go so Filters>Sharpen>unsharpen mask and apply the following settings: Amount 20, Radius 5 and Threshold 5. Click ok.
Element 115: Resize 14% and move to the lower right of element 86.
Element 8: Resize 12% and move to the lower left of element 115.
Element 104: Resize 6% and move to the lower left of element 8. Apply the same unsharpen mask as used on the tube.
Element 3: Resize 14% and move to the bottom center of the fountain.
Element 19: Resize 12% and move to the lower right of element 3.
Element 73: Resize 10% and move to the lower left of element 19.
Element 2: Resize 19% and move to the lower left of element 73.
Element 56: Resize 9% and move to the bottom left of element 2.
Element 47: Resize 8% and move to the lower right of element 56.
Add any other elements or make any adjustments you would like on the tag.
Time for some Drop Shadow.
Select the element on the bottom of your tag in the layer pallet and double click it or click the FX button on the bottom of the layer pallet.
It's Element 91 on my tag.
A layer style window will pop up. Click on Drop shadow. and use the following settings:
Click on image to enlarge it.


Now right click on the layer you just applied the drop shadow. Click copy layer style.
Select element 1, right click and paste layer style.
Select element 30 layer. Hold down the shift key and select the top layer. Right click and paste layer style. Drop shadow is now complete :).
Now for the masks.
Open the PNG mask you just made. Move it to the top left of the tag.
You will see some of it sticking out under the house and fountain. To fix this, add a mask layer by clicking on the mask icon at the bottom of the layers pallet. Make black your foreground as we want to hide this part of the mask. Standing on the mask thumbnail (you should see a white box around the mask thumbnail).

Select the brush tool. I have a brush size set to 50 everything else is the same. Make sure the mask thumbnail is selected. Using the paint brush, paint the portion of the mask you want to hide. Select the move tool again.
Paper 13: Resize 77% and move it over your mask. Right click the paper layer and select create a clipping mask. The nice thing about a clipping mask is you can move the paper around until you find a spot you like best.
Add the png mask again. Resize 65% and mirror. Move over to the far right of the house. Duplicate paper 13 and drag it above the new mask layer. Right click the paper layer and select create a clipping mask. Move the paper around until you see a spot you like best.
Add the png mask again. This time we are going to create some ground coverage. Resize W: 84.03 and H: 15.66 click the check mark. Move this to the bottom of where the tube is sitting. See my example for placement.
Paper 8: Resize 70%. Right click and create a clipping mask. Move the paper into a spot you like best.
Now select the mask layer under paper 8. Hold down the shift key and select paper 8 clipping mask layer. Right click and duplicate. Move this under the snow and sled. See my example for placement.
Resize the mask layer only by W: 92.82% and H: 15.66%. Now select the paper layer and move it into a spot you like best.
Duplicate the mask and paper 8 layer and move this under the teddy bear. Resize the mask part only by W:-92.84 and H: 15.66.
Duplicate the mask and paper 8 layer one more time. Move this under the house layer. Move the paper into a spot you like best.
Crop away any extra space and resize your tag if you like.
Add your copyright and name.
Save as a psd file if you want to add some animation or make tags for others.
I have the animation tutorial here if you would like to add some animation. Click on the link and it will take you so the how to animate tutorial.
If you do not want to animate.
Hide the white background layer.
Save your tag and export as png.
Go to File>Export>Save for Web and use the following settings:
Click on image to enlarge it.

I hope you have enjoyed my tutorial.
Converting a JPG Mask to PNG
Converting a jpg mask to a png mask in PS.
For this tutorial I am using an FTU mask by Vivienne. Thank you for creating these masks for us to use.
Vivienne's masks can be downloaded from her blog here.
I am using mask "Mask_Viv_0041.jpg".
Open the mask in PS.
The mask will show as a Background in the layers pallet. We need to convert this into a layer.

Select the background layer in the layers pallet. Double left click the layer. This will bring a pop up window showing layer 0. Click ok.

Your layer pallet should look like this now.

Next: Add a new layer. Got to Layer>New>Layer. A pop up window will appear. Just click ok.
Fill this layer with black. Go to Layer>New Fill Layer>Solid color. A popup window will appear. Click ok. The color picker will appear. Enter #000000 at the bottom and click ok. Right click this layer and select Convert to Smart object.
Drag this layer under the mask layer in the layers pallet.
There should be two layers. Top layer is the mask and the bottom layer is the fill layer.
Next: Select the mask layer in the layer pallet. Select the Channels tab on top of the layers pallet.

There will be 4 layers in this tab. RGB, Red, Green and Blue. We are working with the RGB layer.

Hold down the Ctrl key and left click on the RGB thumbnail of the mask.
You should now see marching ants around your mask.

Select the Layers tab at the top of the layer's pallet.
Next, select the color fill layer (layer filled with black).
You should still see the marching ants around the mask.
Now standing on your color fill layer, left click the mask icon at the bottom of the layers pallet.

Hide the top mask layer. You should now see the mask with a transparent background.
Go to File>Export>Quick Export as PNG. Leave the file name as is and save it to where you save your masks on your computer.
Close Vivienne's mask and do not save changes.
We have just converted the jpg to a workable png mask or also called a clipping mask.
I hope you have enjoyed my tutorial.
Tuesday, November 10, 2026
Animating in PSP and Animation Shop
Hi everyone.
Currently, I am only writing PS tutorials as it is easier for me to work with.
The non animated tutorials resizing should be the same in PSP as it is in PS.
I have older PSP and Animation Shop tutorials located here. The animation shop tutorial steps can be applied to any animation you are using.
Have fun!!
Winter Pearl - Animated

This animated tutorial was written by me on November 10, 2026. The results are of my own imagination. Any resemblance to another tutorial is purely coincidental.
Please DO NOT claim this tutorial as your own.
This was written assuming you have a working knowledge of PS.
Please keep in mind that I write the tutorial as I am creating it.
Sometimes I may not explain properly where to place things so please see my example if you are ever in doubt :)
You will need to create the tag first. The tutorial to the non animated tag can be found here.
Supplies needed:
I am using Adobe Photoshop 2026 but this tutorial should work with any version.
You can download the 7 day trial of PS here.
PTU Animation: I am using Sophisticat Simone's animation 751 from "Pack 261" which you can purchase here.
Please read Simone's TOUs.
Notes:
I learned how to use PS for tags by trying tutorials from Tutorials by Rene. You can find her PS tutorials here.
I use the CTRL + T command for resizing and rotating.
Resizing: Click on the link to lock the W: and H: for resizing.

Rotating:
This is for rotating to the right enter 15 degrees. To rotate to the left you would enter -15 degrees

To mirror or Flip go to Edit>Transform>Flip Horizontal (mirror) or Flip vertical (Flip).
Remember to save often.
Lets get Started:
We will need to do a little bit of editing to the tag before animating. This part is optional but I find the tube does not turn out so grainy when animating.
Open your tag psd file in PS if not open already.
Select your tube layer.
Right click on the tube and duplicate layer.
Standing on the duplicate layer, right click and clear layer style.
Still on the duplicate layer, go to Filters>Blur>Gaussian blur. Set it to 5 and click ok.
Still on the duplicate layer.
Next, hold down your ctrl key and click on the thumbnail of the original tube. You will see marching ants around your tube. Click on the mask icon on the bottom of your layer pallet.
Change the blend mode to soft light and lower the opacity to 30.
Right click this layer and duplicate it.
Standing on the new duplicate layer, change the blend mode to Screen and lower the opacity to 20.
We are now ready to continue with the animation.
Open Sophisticat Simone's psd file in ps. You will notice that there is 26 layers in this animation and it does not have the group layer. That is ok as we are going to learn how to do this.
We need to group all the layers. Starting from layer 26, in the layers pallet, hold down your Shift key and select layer 1. Once all the layers are selected (the layers will be highlighted in blue) we need to group them. All layers selected?
Next go to Layers>Group layers. You will see group 1 folder at the top. Make sure Group 1 is selected. Or you can select the folder icon on the bottom of your layers pallet.

Select the layer you would like the animation to be placed. I selected the frame 6 layer.
Back to the animation. Click on Group 1 in the layer pallet and drag it into your tag. Resize the animation group by 39%. Move to a spot you like best. I moved it to the top of the word art 2.
Close the original animation and don't save changes.
Click on the little white arrow beside Group 1in the layer pallet to expand it. Click on the eyeball of each layer to hide it but leave frame layer 1 visible. Click on the arrow beside group one to hide all the animation layers as we do not want to accidentally make any changes.
Next make sure your Timeline viewer is open on the bottom of PS. If you do not see a row at the bottom of PS that has Create Frame Animation on the bottom, go to Windows>Timeline.

Next is animating.
Click on Create Frame Animation (this might look different depending on the PS version you are using). The timeline screen should only have one frame in it.

Click on the little icon (three horizontal lines) at the top right end of the timeline screen. A pop up menu will appear. Select make frames from layers.

You are going to see a big mess in the animation window but we are going to fix this.

Click on the first frame and click on the trash can in the animation window (icon that looks like a trash can in the timeline viewer. Repeat this until you reach the first frame of the animation.
Now you should be at the first frame of the animation. Click on frame 27 and hit the trash can. Repeat for all the remaining frames. You should be left with 26 frames in the animation window. This is the amount of frames for our animation.
This next step is very important. Any changes you do from here you must be on frame 1 in the animation window. It will be highlighted in blue.
Make sure you have animation frame 1 in the timeline selected.
Scroll down to the bottom of your tag in the layers pallet.
Starting from the bottom of the layer pallet, click on the eyeball beside each layer to make it visible. For the white base layer you may have to click on it a couple of times to make it visible in all the animation frames. It's a Photoshop thing. Do not touch the group layer.
This is what the animation window should look like once all the frames are visible.
Note: My screen isn't large enough to show all 26 frames.

Next, I want to slow down the animation. With the first frame selected, hold down the shift key and click on frame 26. This will select all the frames.
Next, click on the little black arrow beside the 0 sec as we want to change the speed. A pop up window will appear.

I selected Other. When the new pop up box appears enter 0.15 in the set delay box and click ok.

Now click on the play button in the timeline viewer to view the animation. Click on it again to stop it.
Click frame 1 again so we don't accidentally make any changes.
Now to save our tag as a gif.
Go to File>Export> Save for Web.
A new pop up window will appear. Change the settings to my screen shot below. Click on the image to enlarge it if needed. Click save. Save it to your computer in your tags folder.

I hope you have enjoyed my tutorial.
Winter Pearl - Non Animated

This tutorial was written by me on November 10, 2026. The results are of my own imagination. Any resemblance to another tutorial is purely coincidental.
Please DO NOT claim this tutorial as your own.
This was written assuming you have a working knowledge of PS.
Please keep in mind that I write the tutorial as I am creating it.
Sometimes I may not explain properly where to place things so please see my example if you are ever in doubt :)
Supplies needed:
I am using Adobe Photoshop 2026 but this tutorial should work with any version.
You can download the 7 day trial of PS here.
PTU Tube: I am using a beautiful tube called "Winter Pearl" created by Vi Nina. Please do not use this tube without a proper license.
You can purchase this tube at Vi Nina Tubes store here.
PTU Kit: I am using a gorgeous called "Winter Pearl" created by Luscious Ladee. This kit is the matching kit for Vi Nina's tube "Winter Pearl". Please note that the tube is not included. You can purchase the kit here.
The masks are included with the kit.
Font of choice for your name.
Plug in: None
Drop shadow of choice.
Please read all the Artist's/Designer's TOUs.
Notes:
I learned how to use PS for tags by trying tutorials from Tutorials by Rene. You can find her tutorials here.
I use the CTRL + T command for resizing and rotating.
Resizing: Click on the link to lock the W: and H: for resizing.

Rotating:
This is for rotating to the right enter 15 degrees. To rotate to the left you would enter -15 degrees

To mirror or Flip go to Edit>Transform>Flip Horizontal (mirror) or Flip vertical (Flip).
I convert all my elements and tubes to a smart object as I find the image stays crisp when resizing.
Don't worry about the drop shadow as I add it at the end of the tutorial.
The resizing should be the same in PSP.
Remember to save often.
You might want to grab a coffee or something to drink as my tutorials are lengthy due to how many elements I use in the tag.
Let's get started.
Open a new 850x850 transparent image.
Add a new Raster layer.
Go to layers, new fill layer, solid color. When the pop-up window appears type in FFFFFF and click ok.
Please see Notes on how to resize.
Open Mask 3 in PS. Select Layer 1 in the layer pallet and drag it into your tag. Right click on the element and convert to a smart object. Resize 75% and move to the upper left of the tag.
Open Mask 1 in PS. Select Layer 1 in the layer pallet and drag it into your tag. Right click on the element and convert to a smart object. Resize 44% and move to the lower right of the tag.
I will be repeating the Open element/paper, select Layer 1 in the layer pallet and drag it into your tag. Right click on the element and convert to a smart object for the all the elements/papers before resizing. I will not be including this step in the remainder of the tutorial.
Frame 6: Resize 45% and move to the top right of mask 3.
Select the layer under the frame layer.
Open paper of choice. I am using profile paper 11. Resize 39% and move under the frame into a spot you like best.
Select the frame layer.
Select the magic wand tool on the left tool panel. Click inside the frame. Go to Select>modify, expand by 10.
Select the paper layer.
On the bottom of your layer panel there is an icon that looks like a rectangle with a circle in the center. Click on that icon to add a mask layer to the paper.

Select the frame layer.
Word Art 2: Resize 16% and move to the bottom of the frame.
Element 49: Resize 16% and move to the top right of word art 2.
Element 98: Resize 18% and move to the bottom center of the frame.
Element 15: Resize 42% and move to the left of the frame.
Element 13: Resize 43% and move to the left of element 15.
Element 47: Resize 20% and move to the bottom left of element 13.
Element 101: Resize 8% and move to the bottom right of element 47.
Element 9: Resize 38% and move to the right of element 101. The truck should be covering the bottom of the trees.
Element 30: Resize 16% and move to the bottom center of element 9. The bow should be between the R and P of the truck.
Element 51: Resize 15% and move to the bottom left of element 30.
Element 26: Resize 13% and move to the bottom right of element 30.
Element 59: Resize 8% and move to the bottom center of element 26.
Element 36: Resize 11% and move to the bottom left of element 59.
Element 12: Resize 31% and move to the bottom left of the frame. See my example for placement.
Full tube: Resize 32% and move to the left of element 12. See my example for placement.
Element 16: Resize 26% and move to the center of mask 1. See my example for placement.
Element 46: Resize 24% and move to the lower right of element 16.
Element 20: Resize 11% and mirror. (Please see notes at the top of the tutorial on how to mirror.) Move to the bottom right of element 46.
Element 31: Resize 14% and move to the bottom left of element 20.
Element 7: Resize 40% and move to the lower right of the tube. See my example for placement.
Element 62: Resize 12% and move to the bottom left of element 7.
Element 25: Resize 15% and move to the bottom right of element 62.
Element 105: Resize 7% and move to the bottom left of element 25.
Element 102: Resize 8% and move to the bottom left of element 7. See my example for placement.
Element 43: Resize 15% and move to the bottom left of element 102.
Element 79: Resize 8% and move to the bottom right of element 43.
Add any other elements or make any adjustments you would like on the tag.
Time for some Drop Shadow.
Select the element on the bottom of your tag in the layer pallet and double click it or click the FX button on the bottom of the layer pallet.
It's Frame layer 6 on my tag.
A layer style window will pop up. Click on Drop shadow. and use the following settings:
Click on image to enlarge it.


Now right click on the layer you just applied the drop shadow. Click copy layer style.
Now click on the layer above and hold down the shift key, click on the top layer. Right click and paste layer style. Drop shadow complete :)
Crop away any extra space and resize your tag if you like.
Add your copyright and name.
If you want to add some animation or make tags for others save as psd file.
I have the animation tutorial here if you would like to add some animation. Click on the link and it will take you so the how to animate tutorial.
If you do not want to animate.
Hide the white background layer.
Save your tag and export as png.
Go to File>Export>Save for Web and use the following settings:
Click on image to enlarge it.

I hope you have enjoyed my tutorial.
Monday, November 9, 2026
My Garden

This tutorial was written by me on November 9, 2026. The results are of my own imagination. Any resemblance to another tutorial is purely coincidental.
This is an older tutorial that was written in PSP but I converted it to PS. The Resizing is the same in both programs.
Please DO NOT claim this tutorial as your own.
This was written assuming you have a working knowledge of PS.
Please keep in mind that I write the tutorial as I am creating it.
Sometimes I may not explain properly where to place things so please see my example if you are ever in doubt :)
Supplies needed:
I am using Adobe Photoshop 2026 but this tutorial should work with any version.
You can download the 7 day trial of PS here.
PTU Tube: I am using a beautiful tube called "Joyce" created by Vi Nina. Please do not use this tube without a proper license.
You can purchase this tube at Vi Nina Tubes store here.
PTU Kit: I am using a gorgeous called "My Garden" created by Carita Creationz. This kit is the matching kit for Vi Nina's tube "Joyce". Please note that the tube is not included. You can purchase the kit here.
FTU Mask: Mask 92 by Vivienne's Paintbox. Thank you for your awesome masks. You can download it from her blog here.
I am using the png versions for this tutorial.
Font of choice for your name.
Plug in: None
Drop shadow of choice.
Please read all the Artist's/Designer's TOU.
Notes:
I use the CTRL + T command for resizing and rotating.
To mirror or Flip go to Edit>Transform>Flip Horizontal (mirror) or Flip vertical (Flip).
Don't worry about the drop shadow as I add it at the end of the tutorial.
Remember to save often.
Let's get started.
Open a new 850x850 transparent image. We will resize later.
Add a new Raster layer.
Go to layers, new fill layer, solid color. When the pop-up window appears type in FFFFFF and click ok.
Open Mask_Vivienne_0092 in PS – Left click the mask layer in the layer pallet ( Layer 1) and drag it directly into the tag.
Hit Ctrl + T on your keyboard. On the top of PS click the link between the W: and H:. Resize 95% and click on the check mark on the top right of the bar.
Click on image to enlarge it.

Open paper of choice. I am using paper 3. Open in PS and drag it directly into your tag. (same steps as above). Right click on the paper layer and select Convert to Smart Object. Resize 70% and move over the mask. Right click on the paper and select Create a Clipping Mask. Move the paper layer until you are happy with the placement.
I will be using this method for all the elements in the tutorial. Open element in PS. Left click Layer 1 in the layers pallet and drag it directly into the tag. Right click on the element and select Convert to Smart Object. I convert all my elements, papers, frames and tubes to a Smart Object as I find it keeps the image crisp and you don't have to sharpen the item after resizing.
Hit Ctrl + T on your keyboard. On the top of PS click the link between the W: and H:. Resize 95% and click on the check mark on the top right of the bar. I will be using this technique for resizing all the elements and papers.
Element 10 – Resize 40%, move to the upper right of the mask.
Element 8 – Resize 54%, move to the lower left of element 10.
Element 17 – Resize 15%, move to the lower right of element 10.
Element 11 – Resize 13%, move to the lower right of element 17.
Element 12 – Resize 10%, move to the lower left of element 11.
Element 53 – Resize 35%, move to the top right of element 8.
Element 43 – Resize 15%, mirror and move to the bottom right of element 8.
Go to Edit>Transform>Flip Horizontal (mirror).
Element 4 – Resize 40%, move to the bottom of element 12. See my example placement.
Vi Nina’s tube - Open the tube in PS. Select the full size tube and drag it into your tag. Close the original. Select the tube layer, right click and convert to smart object. Resize 30%. move between element 4 and element 8.
Element 01 – Resize 15%, move to the bottom right of the tube.
Element 05 – Resize 35%, move to the bottom left of element 8.
Element 02 – Resize 20%, move to the bottom right of element 8.
Element 18 – Resize 20%, move to the bottom right of the tube.
Element 16 – Resize 15%, move to the bottom left of element 18.
Element 37 – Resize 20%, move to the bottom left of the tube.
Element 21 – Resize 17%, move to the bottom right of element 02.
Element 40 – Resize 15%, move to the bottom right of element 37.
Element 30 – Resize 15%, move to the bottom right of element 21.
Element 32 – Resize 10%, move to the bottom left of element 30.
Element 28 – Resize 10%, move to the bottom right of element 30.
Element 15 – Resize 17%, mirror and move to the bottom right of the pail.
Element 51 – Resize 20%, move to the bottom left of the pail.
Element 14 – Resize 15%, move to the bottom of element 51.
Element 39 – Resize 7%, free rotate to the right 15 degrees. Move to right middle of element 10.
Click on image to enlarge it.

Duplicate, mirror and move to the top of element 8.
Element 58 – Resize 15%, move to the bottom left of the lantern.
Add any other elements or make any adjustments you would like on the tag.
Time for some Drop Shadow.
Select the element on the bottom of your tag in the layer pallet and double click it.
It's layer 4 on my tag.
A layer style window will pop up. Click on Drop shadow. and use the following settings:
Click on image to enlarge it.


Now right click on the layer you just applied the drop shadow. Click copy layer style.
Now click on the layer above and hold down the shift key, click on the top layer. Right click and paste layer style. Drop shadow complete :)
Crop away any extra space and resize your tag if you like.
Add your copyright and name.
Hide the white background layer.
Save your tag and export as png.
Go to File>Export>Save for Web and use the following settings:
Click on image to enlarge it.

I hope you have enjoyed my tutorial.
Subscribe to:
Posts
(Atom)
My Blinkie

I CT for



Favorite Stores














Sites I visit